Welcome back to our blog! In our last post, we announced our new project and now it’s time to get down to work. One of the first steps we need to take is setting up a Kubernetes cluster so that we can deploy our containerized application and make it accessible to users online. we have chosen DigitalOcean’s cloud platform for the tasks of hosting our Kubernetes cluster. There are several reasons why we went with DigitalOcean, including the fact that they offer managed Kubernetes clusters which makes the process of setting up and maintaining the cluster much easier for us. In this post, we will go over the process of setting up a Kubernetes cluster on DigitalOcean and deploying our application and making it securely accessible on the interment.
The first step in getting started with DigitalOcean is to setup an account. Once you have your account set up, login and you will see a Kubernetes menu option under manage on the left side of the page. Click on the Kubernetes option to access the Kubernetes cluster page. On the Kubernetes cluster page, you will find a button called “create cluster”. Click on the “create cluster” button to begin the process of creating a new managed cluster. On the create cluster page, you will be presented with several options including the datacenter you want the cluster hosted in, the version of Kubernetes you want installed, the number of nodes you want (you pay for each node), and other various options. For the most part, you can keep the default settings and scroll to the bottom and click “create cluster”.
This will initiate the process of setting up the Kubernetes cluster, which will take some time.

Once the installation is complete, you will want to click on the marketplace tab and install the NGINX Ingress Controller and Cert-Manager. DigitalOcean makes this process easy by providing one click installation for each of these tools.
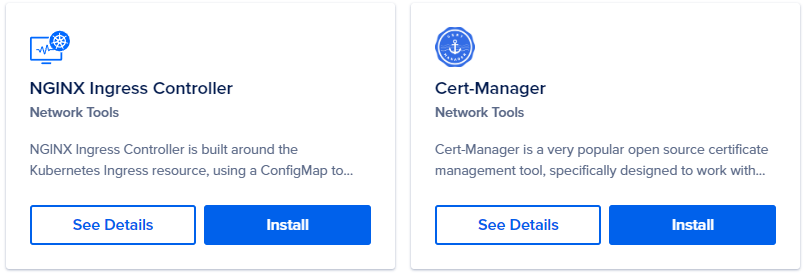
The NGINX Ingress Controller will help route external traffic (HTTP requests) to our backend services, while the Cert-Manager will assist with acquiring, renewing, and using SSL/TLS certificates to secure our services. Since we will be containerizing our application for deployment to our Kubernetes cluster we will need a container registry to host our application’s container. Digital Ocean offers the ability to create your own container registry, which you can access by clicking on container registry under manage in the menu on the left. Once you have created your registry, you will need to integrate it with your Kubernetes cluster to give it access to the registry. To integrate the container registry you just created with the cluster click on Integrate with Kubernetes under getting started, and then check the checkbox next to the cluster you want to integrate with the registry.

To connect to and manage our Kubernetes cluster, we will be using two command line interfaces (CLIs: Doctl and Kubectl. Doctl is a command line tool for DigitalOcean that allows us to manage various aspects of our DigitalOcean account and resources, including our new Kubernetes clusters. With Doctl, we can create and delete clusters, view cluster details, and perform other tasks. Kubectl is a command line tool for controlling Kubernetes clusters. It allows us to deploy applications, view and manage cluster resources, and perform other tasks from the command line.
For instructions on how to install kubectl visit https://kubernetes.io/docs/tasks/tools/ and you will find instruction on how to install the CLI on Linux, macOS, or Windows.
For instructions on how to install doctl visit https://docs.digitalocean.com/reference/doctl/how-to/install/ and you will find detailed instructions on various methods to install the CLI.
Once you have the CLIs kebectl and doctl installed we can connect to the Kubernetes cluster by running the command that is provided by DigitalOcean on the cluster page when you click on connecting to Kubernetes
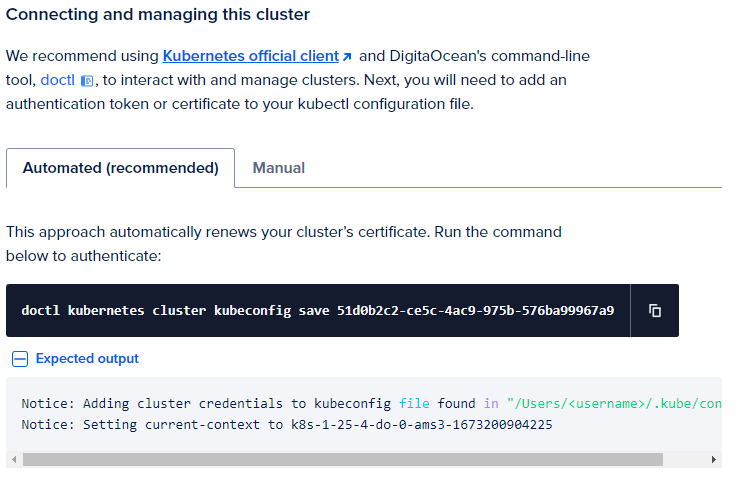
To verify that you have successfully authenticated with the cluster run the command “kubectl get nodes” from a command prompt and if you are connected the cluster will return a list of nodes

Now that we have successfully set up our Kubernetes cluster and a container registry at DigitalOcean, we are ready to begin deploying our application to our cluster. In the next post, we will walk you through the process of building an image and pushing it to our registry that we have setup at DigitalOcean. Then We will create the necessary Kubernetes manifests to deploy the application into the cluster and set up a service on the cluster by applying the manifests to the cluster using the kubectl CLI.
Leave a Reply